FINALLY! After an unusually cold and snowy winter, I’ve been able to get the bike out. (Even the drone has been grounded due to wind and weather.) We’re finally well above freezing, although the wind chill seems to be on the cold side for this time of year.
I have been using the down time for reading and researching new tech and upgrades to my current rigs. Naturally, I couldn’t wait to start implementing some new ideas with my 360 videos. After a recent “pucker incident” (see below), I’ll be upgrading my mounting system, but the big addition is GPS telemetry. This will be added to motorcycle videos as well as Drone videos (coming soon).
I used Telemetry Overlay from App Prototyping Barcelona (thank you again, Jaun!) for the overlays. The workflow is to edit the video first in the Insta 360 Sudio app, using FreeCapture to edit, but do NOT change the in point just yet. Export the video, then import it into Telemetry Overlay, import the GPS data from the .insv file, and edit your overlays. The interface is brilliantly easy to use, very intuitive and there are several excellent tutorials available for figuring out the “fiddly bits.”[1]You know, around the Fjords.
After exporting from Telemetry Overlay, you can pull the video into another editor, such as Final Cut to trim, insert transitions, color correct, edit audio, etc., or you can set in and out points in Telemetry Overlay, export, then post. (Which is what I did in the above video.)
My current method of capturing data for the motorcycle is to use the Insta 360 GPS Smart Remote that will record the data to be the software. It works, but as is seen in the video, the data it captures is not the most accurate. I may finally cave in and purchase the Garmin I’ve been wanting expressly for this purpose. Sure, I could use my phone, but it is already in use while I ride as my stereo and, well, as my GODDAM PHONE!
While it the Insta 360 Studio works, I don’t care for the futuristic style of the gauges in the app, and with the data not being so accurate, I prefer the Telemetry Overlay software as it can utilize other .gpx files and even synchronize the data. 10/10 would buy again.
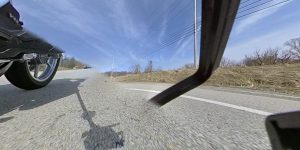
Naturally, into every life a little rain must fall. I had currently been using the Small Rig clamp with ball joints to angle the selfie stick to get the shots I wanted. I generally will clamp it onto my luggage rack, or engine guard, set my angle and “off we go.” Well, after 3 years of using this method, I finally found a problem. It’s one of leverage. The ball that connects directly to the clamp uses a standard 1/4 20 thread, so far so good. But, if that ball is facing out to the right of the motorcycle, with the selfie stick extended 5 feet vertically, and the wind pushing it to the rear of the bike with the camera at the top, what you have is, in fact, a breaker bar trying to unscrew that ball. Quite efficiently, I might add, as the end of this video shows.
With no small bit of luck, the camera never hit the ground as I was able to catch it with the toe of my boot. However, the lens guards that I rely on to protect the most expensive camera I currently own, did go flying (literally) into traffic. The force was enough to pop open the case, but the camera never came out.
 |
 |
 |
 |
I have since received replacement lens guards, but have also found ND filters that act as guards, so I hope to have better videos coming soon. Additionally, I’ve ordered Manfrotto clamps for mounting the camera and will be posting/doing a post with mounting advice (hopefully as good as that) coming soon.
In the meantime, let’s go for a ride. Feel free to scroll around.
Jim says: “Why do you build me up, Buttercup…”
Footnotes
| ↑1 | You know, around the Fjords. |
|---|


